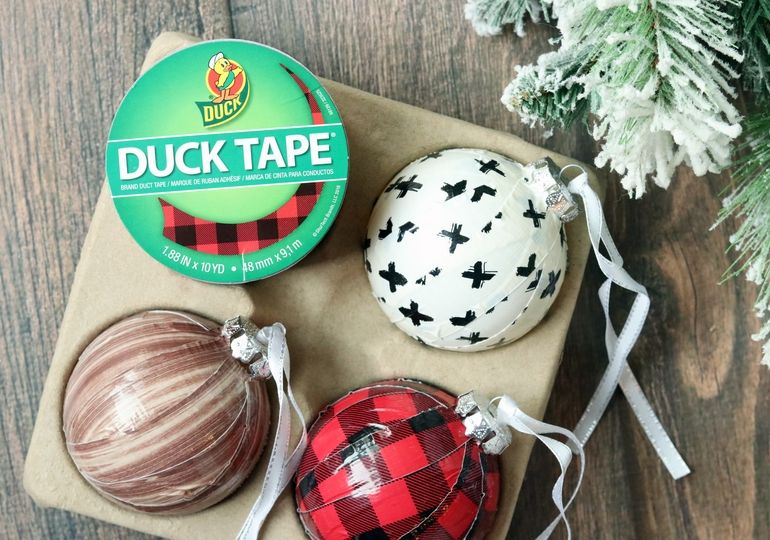
During the holiday season, I always try to think up no-mess crafts for my children’s school parties! I’m so excited to share this Duct Tape Christmas Ornaments with you! It’s super easy to put together, and each child can customize it with their own color of tape! Check out these super easy DIY Christmas Ornaments.

More Christmas Finds
Christmas Ornaments
Or, if you want to change your holiday decoration colors, it’s a super cute and cost-efficient way to customize your ornaments without the price of brand new decorations. I loved creating these farmhouse style ornaments for our tree simply with duct tape!
How to Make Duct Tape Christmas Ornaments
First, you’ll need plastic ornaments. I would steer clear of glass ornaments for this project, so you don’t accidentally break them when applying the tape. You may either buy the clear ones in the craft section or upcycle plastic ornaments you already have which no longer match your current décor style! Then, you’ll need duct tape, of course.
You could either choose themed duct tape, metallic duct tape, or this farmhouse style duct tape that I chose. I love the woodgrain and the buffalo check designs, especially!

First, cut or tear the sections of tape in half lengthwise. The thinner tape will help decrease the number of air bubbles underneath and will be easier to wrap smoothly around the ornament. The measurement of the section of tape will depend on the diameter of the ornament you choose to cover.
Next, start with one end of the tape at the edge of the top of the ornament, wrap it underneath and then up the other side to the top of the ornament on the opposite side. Keep doing this until the entire ornament is covered. You’ll have tape overlapping near the top and bottom of the ornament, but that’s okay. Keep repeating this process until all holes are completely covered on the sides, too.

I LOVE how these turned out!! It’s such a simple and inexpensive way to totally makeover your existing decorations. It’s also so fun to have your children be proud of their work and a project they create!
There are so many duct tape designs these days, including NFL teams; the options are endless!! You could even create a custom set of ornaments and give it to someone as a gift! I’d love to see the duct tape you choose for your ornaments!

Duct Tape Christmas Ornaments
Duct Tape Ornaments is a fun way to change up the theme for your Christmas Tree so easily and affordably.
Materials
- Duct Tape (any print you want)
- Clear Plastic Ornaments
- String for hanging
Tools
- Scissors
Instructions
- Cut thin strips of Duct Tape and sit them on the edge of a table to hang.
- Then take the top off the ornament and work on laying out each strip of tape to the ornament.
- Overlap the tape so it covers the whole ornament. Cut off any excess tape you have.
- Tie string to hang, or use the metal hanger it came with. Then place the top back on the ornament, and hang on a tree.
Recommended Products
As an Amazon Associate and member of other affiliate programs, I earn from qualifying purchases.

Tag me on Instagram; I’m @passion4savings. I can’t wait to see your masterpieces!!
How fun are these Christmas tree ornaments you can make yourself? Give these DIY Christmas Ornaments a go and let me know how you like them.


