This Turkey Painting Activity for Kids is SO fun and easy! It kept my kids entertained for over an hour while they enjoyed mixing colors and painting to their heart’s content! I love this activity because I don’t have to stand over my children’s shoulders to guide them through the steps of the project; there is truly no wrong way to paint this once the project is set up for them!

Instructions for Turkey Painting Activity for Kids
This project isn’t complicated at all, and only requires a few supplies! In fact, we had most of them at home already!
Supplies for Turkey Painting Activity for Kids
- Kraft Paper on a Roll (Or, you could upcycle cardboard from a box) – Usually I’ll buy a bulk size roll of kraft paper on Amazon a couple times a year and use it to wrap gifts and for all of our craft projects! Doing this is much more inexpensive than buying the smaller rolls at the store.
- Painters Tape
- Paint Brushes
- Paint Palette – Sometimes we use paper plates in a pinch, though! If you do use a paper plate as a palette, be sure to use the coated kind. If you use uncoated, the paint will really start to soak into the plate. You’ll waste less paint if you use a coated paper or Styrofoam plate.
- Craft Paints
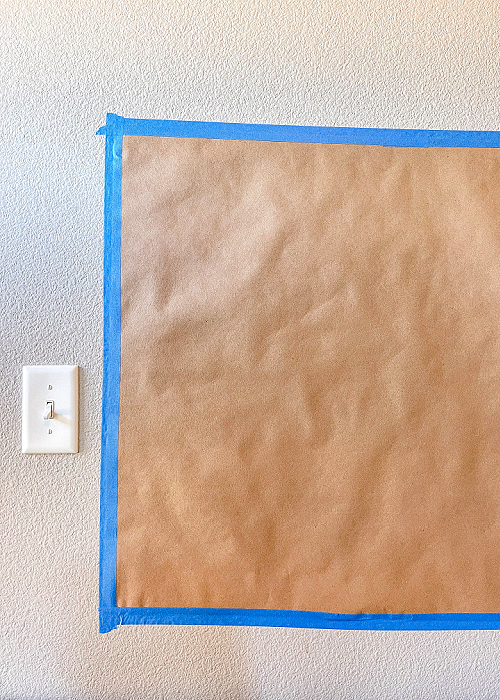
First, tape a piece of kraft paper to the wall with painters tape. You could also upcycle a piece of cardboard instead, if you’d like!
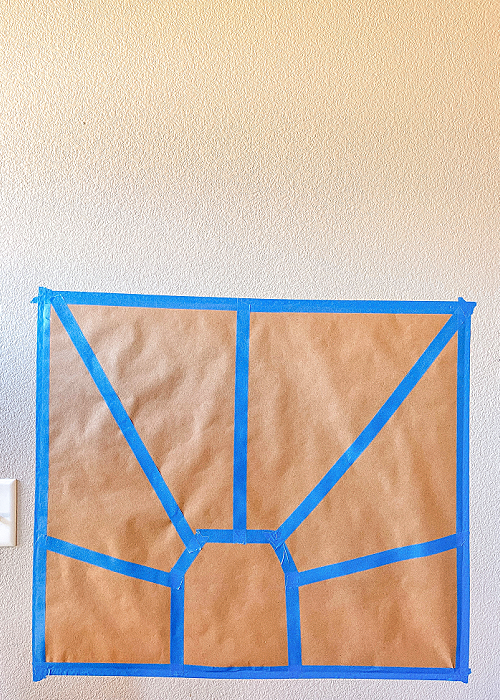
Next, with the painters tape, draw the head of the turkey in the middle. Add five strips of painters tape like in the photo which will be the feathers.
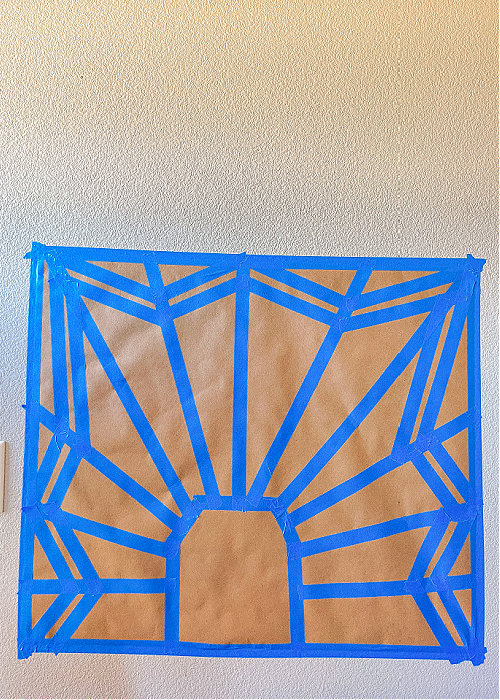
Then, add a line of painters tape in the middle of each feather. Next, add the v-shaped elements at the end of the feathers. (This goes much quicker than it looks!)
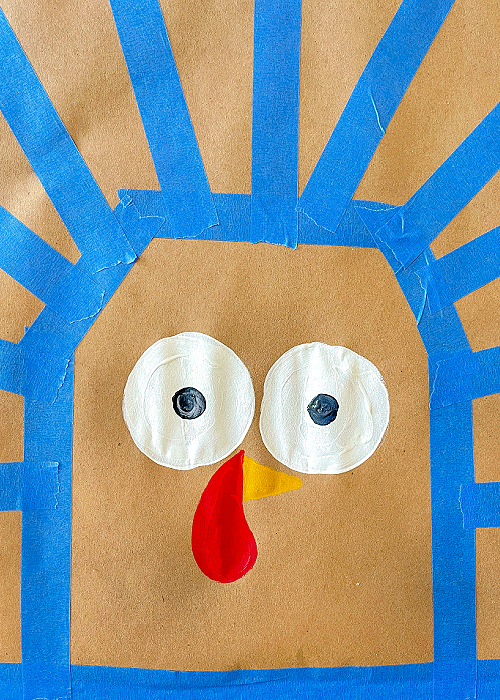
Paint a turkey face with white, black, yellow, and red paints. I painted the eyes first, then the beak, then the turkey waddle.
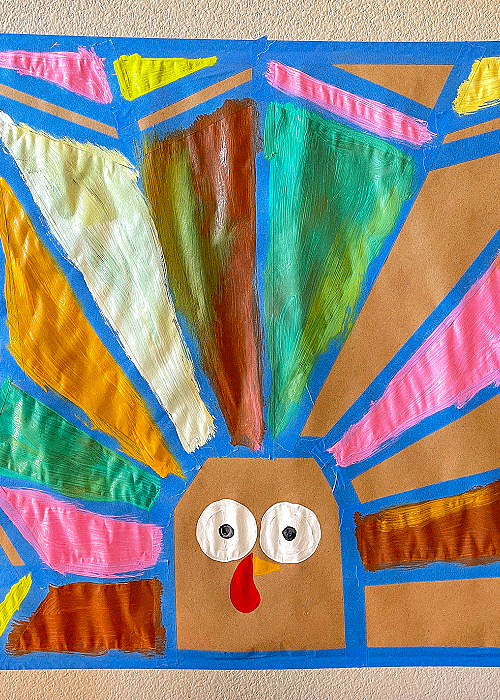
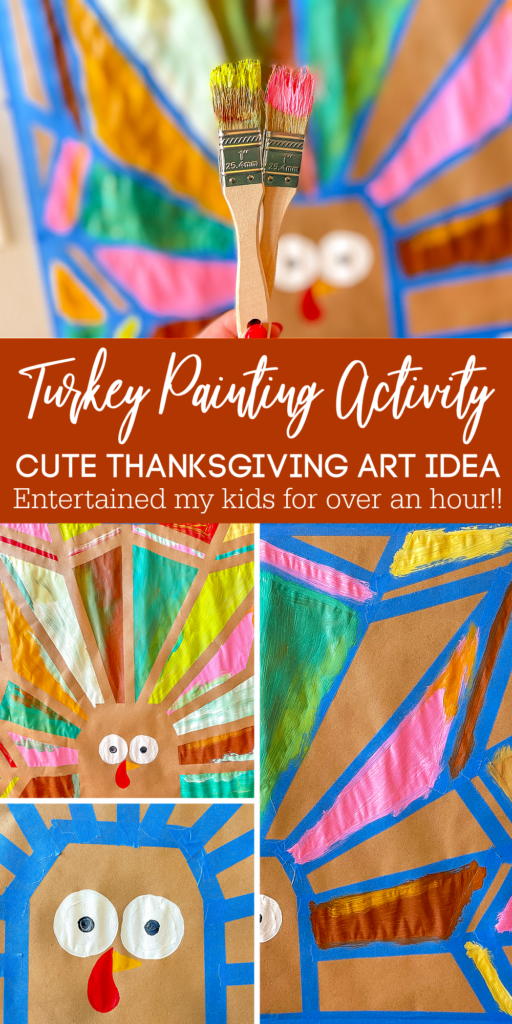
Next, let your kids fill in the sections with paint! It doesn’t matter if they mix the colors; I think it’s more fun that way! We didn’t use traditional turkey colors. I let my kids pick out the colors they wanted their turkey to have for their Turkey Painting Activity. Don’t you LOVE how it turned out?!
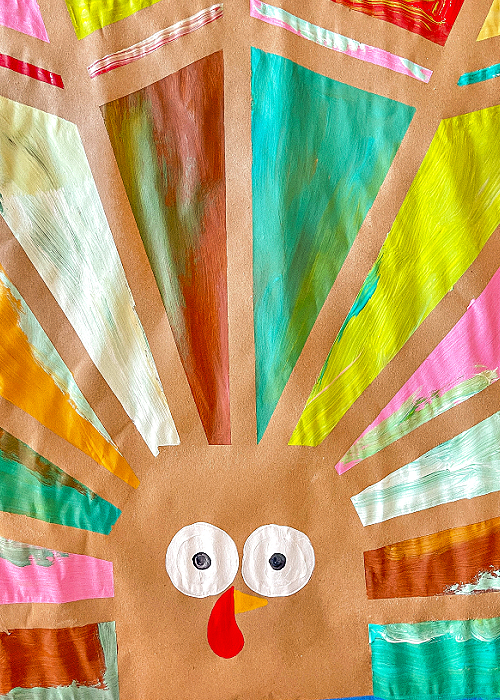
Aren’t these colors beautiful? Let the paint dry and then remove the tape, of course!
What kind of paints do I use?
For this Turkey Painting Activity for Kids, you could use craft paint, acrylic paint, or tempera paint. Whatever kind of paint you use, just be sure it’s water-based and washes off easily.
More Thanksgiving Ideas for Kids
- Easy Thanksgiving Crafts and Recipes for Kids
- DIY Thankful Tree
- M&M Gratitude Game
- Easy No-Carve Scrapbooking Pumpkin Idea

Turkey Painting Activity for Kids
Using a resist technique with painters tape, this Turkey Painting Activity for Kids is an easy and festive way for kids to be creative at Thanksgiving!
Materials
- kraft paper
- 1" wide painters tape
- craft paint
Tools
- paintbrush
- scissors
Instructions
- Cut a piece of kraft paper and tape it to the wall with painters tape.
- Tape out the half-oval head of the turkey with painters tape.
- Next, tape out the feathers and v-shaped accents at the end of each feather with painters tape. Use the step-by-step photos as a guide.
- Paint the turkey face using white, black, yellow, and red craft paint.
- Let you kids paint over the tape. This creates the turkey's feathers!!
- Let the paint dry completely and slowly remove the tape.